Lafferty Equipment Manufacturing, LLC

Installation & Operation Instructions

Model # 224176-A · Hose Reel, SS, For 1/2" x 50', 2500 PSI, With Jumper Hose Kit

Requirements
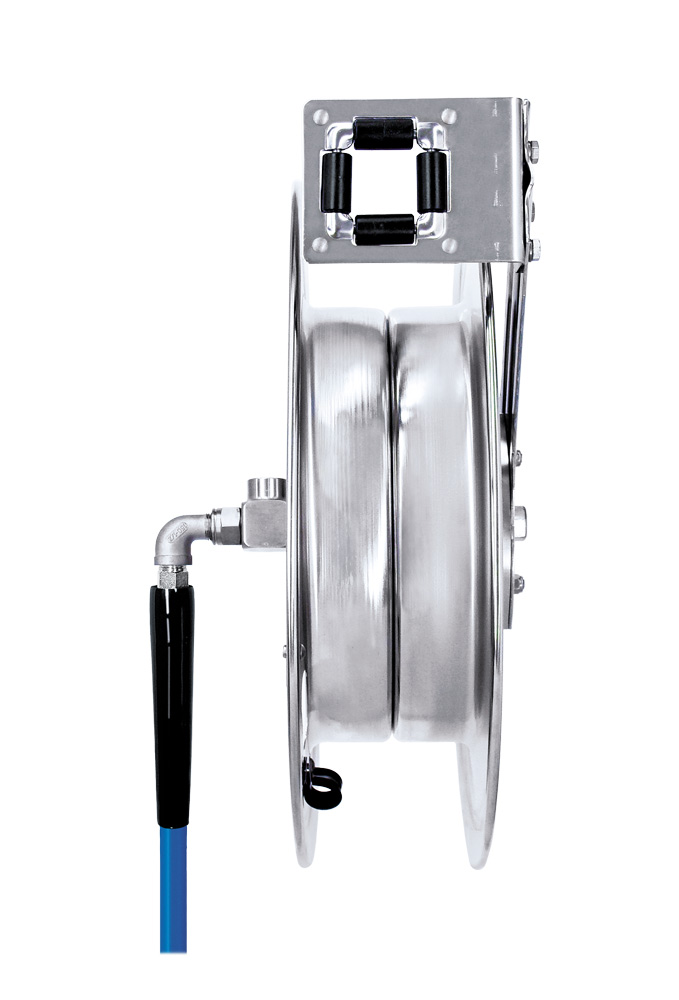
Recommended Discharge Hose
Max. Length 50 feet
Max. I.D. 1/2"
Max. O.D. 3/4"
Max. Pressure 2500 PSI
224176-A
Warning! Read All Instructions Before Using Equipment!

Overview

This professional-grade, heavy-duty hose reel will accommodate a 1/2" ID hose up to 50 feet (2500 PSI maximum water/solution pressure). A multi-position, locking, ratchet mechanism secures the hose at the desired length and spring assisted retraction takes the effort out of coiling heavy hoses. Stainless steel construction offers non-corrosive performance in demanding industries. Includes inlet jumper hose, but does not include discharge hose.

Safety & Operational Precautions

  • Manufacturer assumes no liability for the use or misuse of this unit.
  • Only qualified personnel should undertake the installation and servicing of this product.  Improper installation and/or service voids warranty.
  • Disconnect pressure from the hose reel before servicing.
  • Do NOT disassemble the spring motor, serious injury could result.
  • Observe ALL safety and operational precautions for any applicator used in conjunction with this hose reel.

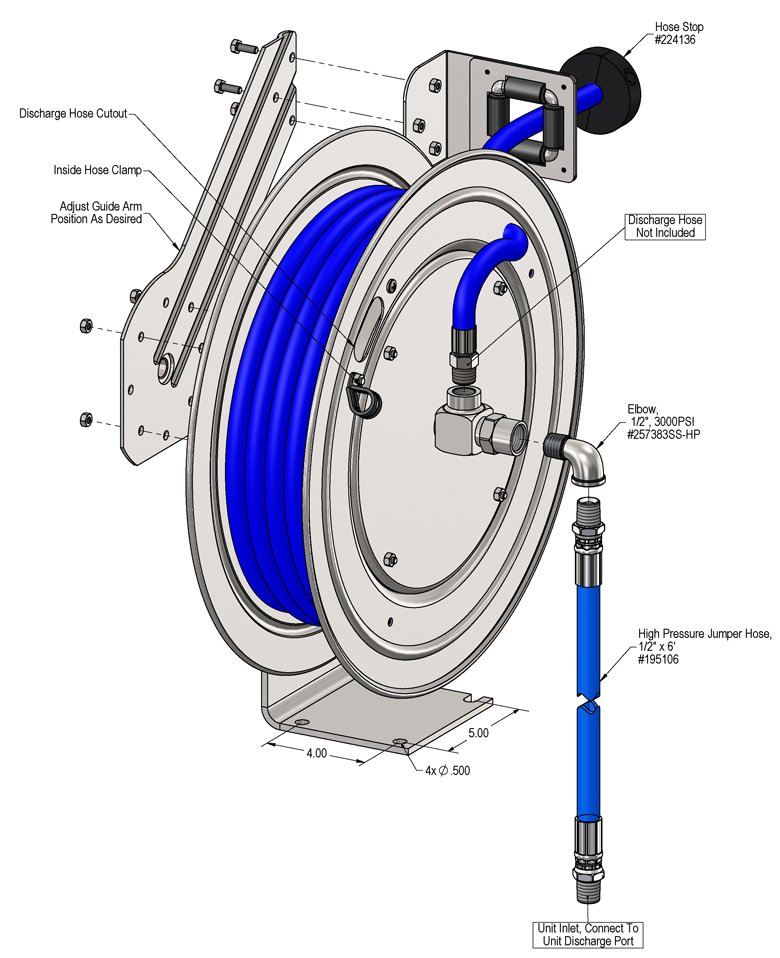
To Install (refer to diagram on next page)

1.  Mounting of Reel
  • Adjust guide arm to the desired position (Page 2, Figure 1.0)
    • Remove four bolts holding guide arm to support base.
    • Reposition guide arm and securely fasten four bolts.
    • Reposition inside hose clamp to alternate position, as needed.  For ease of operation, guide arm "rollers" should face the work area.
  • To mount reel to a solid structure use four 7/16" or M12 bolts, washers, and nuts.  Four masonry bolts may be used depending on mounting application.
  • Loosely fit two pieces of mounting hardware (screws, bolts, etc.) to ceiling/floor/or wall so that reel can be slid into position.  Fit reel.  Install two pieces of hardware in other end of reel.  Securely fasten all bolts and nuts.
  • NOTE: Overhead installation mountings should be such that the reel is not supported by bolts in tension.  A safety chain, cable, enclosure or netting is strongly recommended to minimize damage and/or possible injury in the event of a mounting failure.
2.  Installation of Inlet (Jumper) Hose
  • NOTE:  Use a flexible inlet hose only and ensure matching hose internal diameter if using other than the included jumper hose.
  • NOTE:  Do NOT use solid piping or restrain inlet hose as to cause any side force on the swivel joint.
  • Attach the discharge hose to the inlet swivel as shown in the diagram (Page 3)
  • Likewise affix the other end of the inlet (jumper) hose to the desired water or RTU chemical source.
3.  Installation of Outlet (Discharge) Hose
  • Securely stabilize the reel.
  • Wind the reel drum clockwise (facing the inlet connections) until the spring is tight.
  • NOTE:  Use extreme CAUTION!
  • Back off 2-3 turns and lock the reel drum to keep from rotating.
  • Insert the male fitted end of the hose through the roller guide arm and through the cutout in the side of the drum flange.
  • The male hose fitting should now be protruding through the discharge hose cutout from the inside to the outside of the drum.  Apply thread sealant and connect hose fitting to the swivel joint and secure the hose with the two hose clamps.
  • NOTE: If the guide arm was repositioned, ensure that the inside hose clamp was repositioned accordingly.
  • OPTIONAL:  If a hose stopper is necessary to prevent full retraction of the hose-end tool, affix the stopper (not included) on the outlet hose at the appropriate location near the nozzle end of the hose.
  • CAREFULLY release the locking ratchet and SLOWLY allow the hose to retract onto the reel.
  • Attach the discharge assembly (ball valve, wand, nozzle, etc.)

To Operate

To Remove Hose

  1. With the discharge applicator (wand, nozzle, etc.) firmly in one hand, grab the hose with your other hand.
  2. Pull away from the reel. Note that the hose can be pulled in any direction on the 4 Guide Arm Rollers.
  3. Once a sufficient length of hose has been removed from the reel, simply stop pulling and the reel will lock in place.

To Retract Hose

  1. With the discharge applicator (wand, nozzle, etc.) firmly in one hand, grab the hose with your other hand and pull away from the reel.
  2. The ratchet mechanism latches on the first, second, third, or fourth "click". After fourth "click" it automatically rewinds.
  3. With the reel rewinding automatically, walk the discharge applicator back to the reel. Do NOT allow the reel to retract the hose without securing the discharge applicator in hand.
224176-A.jpg
Troubleshooting Guide
Problem Possible Cause / Solution
StartupMaintenance
A) Hose will not fully retract.
B) Hose will not retract at all.
C) Reel will not latch.
D) Fluid leaks from swivel assembly.
E) Hose locks up when fully extended.
1,2

3
4
5
6
7
8
9
Possible Cause / Solution
StartupMaintenance
  1. Applicator discharge assembly, gun, or tool is too heavy.
    • Add spring tension.
  2. Installed hose is too long.
    • Use the correct hose length (see REQUIREMENTS).
  3. Incorrect operation.
    • Reel latches on first, second, third, or fourth "click". After fourth "click" it automatically rewinds.
  4. Inlet hose is not flexible.
    • Use a flexible inlet hose. Do NOT use rigid hose or pipe.
    • NOTE: Make sure the leak is not at the hose fitting!
  5. Hose clamp is in the incorrect position.
    • Relocate hose clamp to optional location.
  1. Spring is fatigued.
    • Add spring tension.
    • Replace Spring Canister, if required.
  2. Spring has lost all tension or has possibly broken.
    • Reinstall spring tension using the outlet hose installation procedure.
    • Replace Spring Canister, if required.
  3. Dog spring or locking cam is broken or worn.
    • Replace dog spring or locking cam.
  4. Swivel seals are damaged or worn.
    • Replace swivel seals.
    • NOTE: Make sure the leak is not at the hose fitting!
Swivel Assembly Seal Replacement. All of the wear parts (o-rings and seals) for this reel are contained in the swivel assembly. This allows the user to remove only the small swivel assembly for maintenance instead of servicing the entire reel. TO SERVICE: Remove inlet hose from swivel assembly. Remove swivel assembly from reel by unscrewing swivel from the axle shaft. Disconnect hose from swivel. Remove retaining ring on swivel; pull out shaft from body. Replace the seals, lubricate and reassembly swivel. Fit hose to swivel, then fit swivel to reel. Do not over-tighten. Reconnect inlet hose and test for leakage.

Spring Canister Replacement. DO NOT attempt to service any spring canister components. Contact us if it becomes necessary to replace the spring canister.