Lafferty Equipment Manufacturing, LLC

Installation & Operation Instructions

Model # 910005 · Airless Tire Foamer Set

Requirements

RTU Chemical Solution
Temperature up to 160°F
Pressure 35-125 PSI
Flow 2.0 GPM @ 40 PSI
Supply Line 1/2" & 3/8"

Weight & Dimensions

Single Package
Shipping Weight5 lbs.
Shipping Dimensions15" x 15" x 5"
910005
Warning! Read All Instructions Before Using Equipment!

Overview

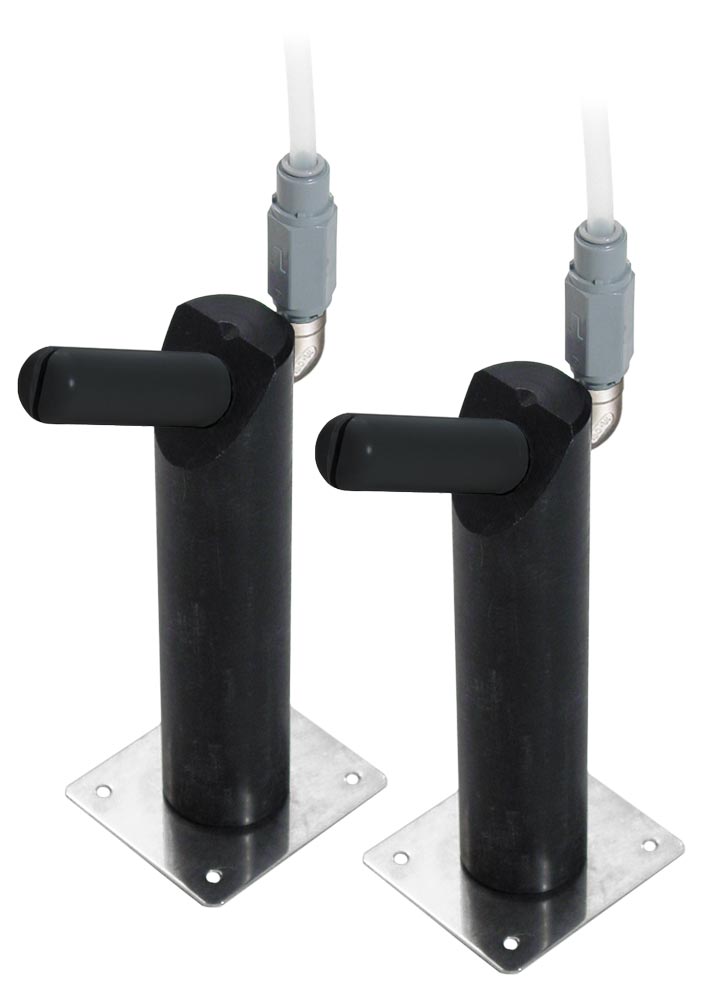
The Airless Tire Foamer Set is designed to apply wet clinging foam to passenger vehicle tires in tunnel washes. Fed with RTU foaming chemical solution from a central chemical feed system, each of the two unique adjustable Lafferty Bullet Airless Foam nozzles project a wet clinging foam, in wide or narrow foam patterns.*
Safety & Operational Precautions

  • For proper performance do NOT modify, substitute nozzle, hose diameter or length.
  • Manufacturer assumes no liability for the use or misuse of this unit.
  • Wear protective clothing, gloves and eye-wear when working with chemicals.
  • Always direct the discharge away from people and electrical devices.
  • For pressures over 100 PSI, remove the discharge valve or lower pressure
  • Follow the chemical manufacturer’s safe handling instructions.
  • Turn off solution supply and air when unit is not in use for extended periods.

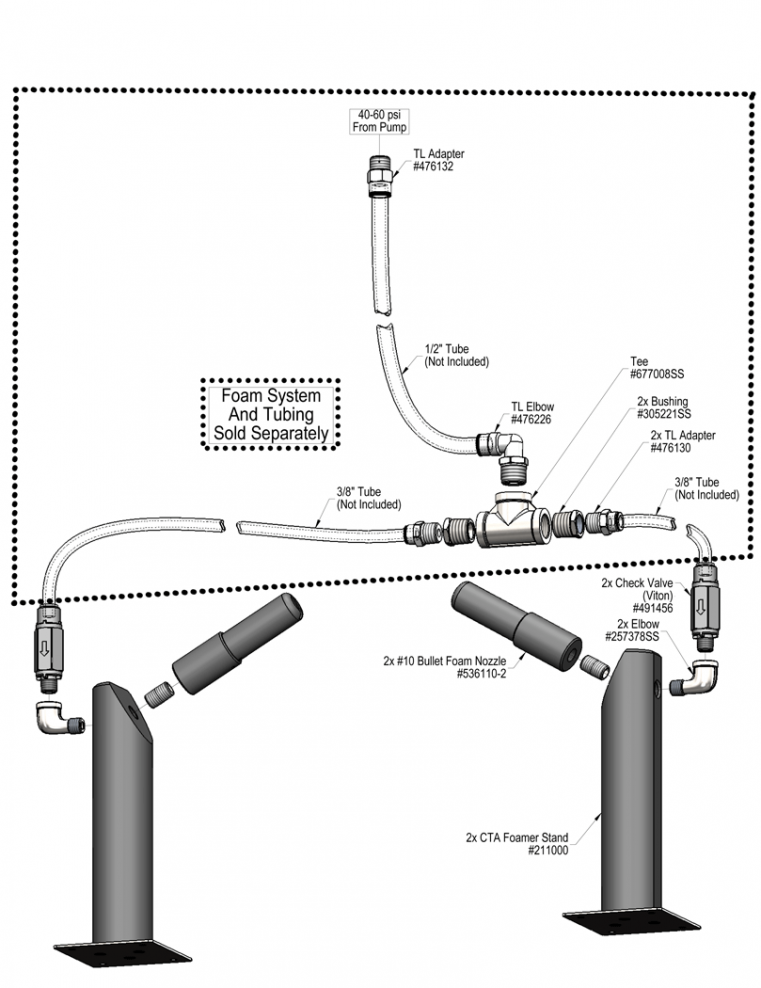
To Install (refer to diagram on next page)

System requirements that are NOT included: Central chemical feed system,  1/2",  & 3/8" poly tubing

  • On the initial set up, use more chemical than is needed. This will ensure you have enough chemical to foam and make it easier to adjust the first time. Then go to normal concentrations. 
  • Mount the two foamers in the bay on either side in a safe location within 2-3' of the tires.
  • Push connect 1/2" tubing to the solution discharge fitting of central chemical feed system (not included), run it out to the bay and connect to a "splitter".  Then run 3/8" tubing to each foamer. For best performance install the splitter in the center of the bay, making the 3/8" tubing going to the foamers the same length.

To Operate


  1. Activate the solution pressure and wait a few seconds for the air to purge out of the solution tube and for the solution to get to the foamers.
  2. Wait several seconds for the foam to stabilize. Turn the "foam nozzle" 1/4 turns clockwise to change the pattern from a wide to a narrow. If the foam is surging increase the chemical concentration. Foaming will not smooth out till it has enough chemical. 
  3. Adjust the nozzles pattern as needed for complete coverage.
  4. Rotate the slotted nozzle 1/4" turns clockwise, once the desired pattern is established if the pattern isn't up and down then tighten the nozzle into the base till it is in the right position to achieve the best coverage.
  5. Once the nozzles are adjusted properly, no further adjustment should be needed.
  6. You are ready for operation.
910005-with-box.png
Troubleshooting Guide
Problem Possible Cause / Solution
StartupMaintenance
A) Foam does not clean or foam properly
B) Using too much chemical
C) Foam pattern not satisfactory
1,2,3,4
5
6
7,8
Possible Cause / Solution
StartupMaintenance
  1. Not enough chemical - solution too weak
    • Increase chemical solution strength
  2. Improper chemical
    • Ensure product is recommended for foaming and the application.
  3. Solution pressure not high enough.
    • Increase solution pressure to a minimum of 35 PSI.
  4. Soil has hardened on surface; always rinse before it dries
    • Reapplication may be necessary
  5. Solution too strong
    • Decrease chemical solution strength
  6. Airless Foam nozzle needs adjustment
    • Turn nozzle head clockwise in 1/4 turn increments until the desired fan pattern is obtained.
    • To adjust pattern angle, tighten nozzle at base
  1. Supply line clogged
    • Clean/flush through with hot water, flush with descaling acid or replace
  2. Bullet Airless Foam nozzle clogged.
    • Clean/flush out with hot water, soak in descaling acid or replace
PREVENTIVE MAINTENANCE: When the unit will be out of service for extended periods, place chemical tube(s) in water and flush the chemical out of the unit to help prevent chemical from drying out and causing build-up. Periodically check and clean chemical strainer and replace if missing.